
Let's take a moment on Remembrance Day to honour soldiers, past and present.
*********************************************
I am very excited about today’s post!
Excited indeed!
This weekend, instead of doing my schoolwork, I decided to
do some crafting. I’m responsible like that, you see. But this craft marks the beginning
of my biggest project to date! So I am excited! The rest of the project will
happen after midterms. Actually, my biggest project to date is my DIY upholstered headboard. I'm not sure if this one is bigger or not. We'll see.
This weekend I used silicone moulds and moulding sticks to
create tiny little frames for tiny little labels!

Ok, so I just gave away the rest of the project. If you read
my blog regularly, you may remember when I mentioned my big project in my post about bedroom updates. The plan is to revamp
my dresser, giving it a healthy coat of black, along with some other much needed
updates.
So these tiny little frames:
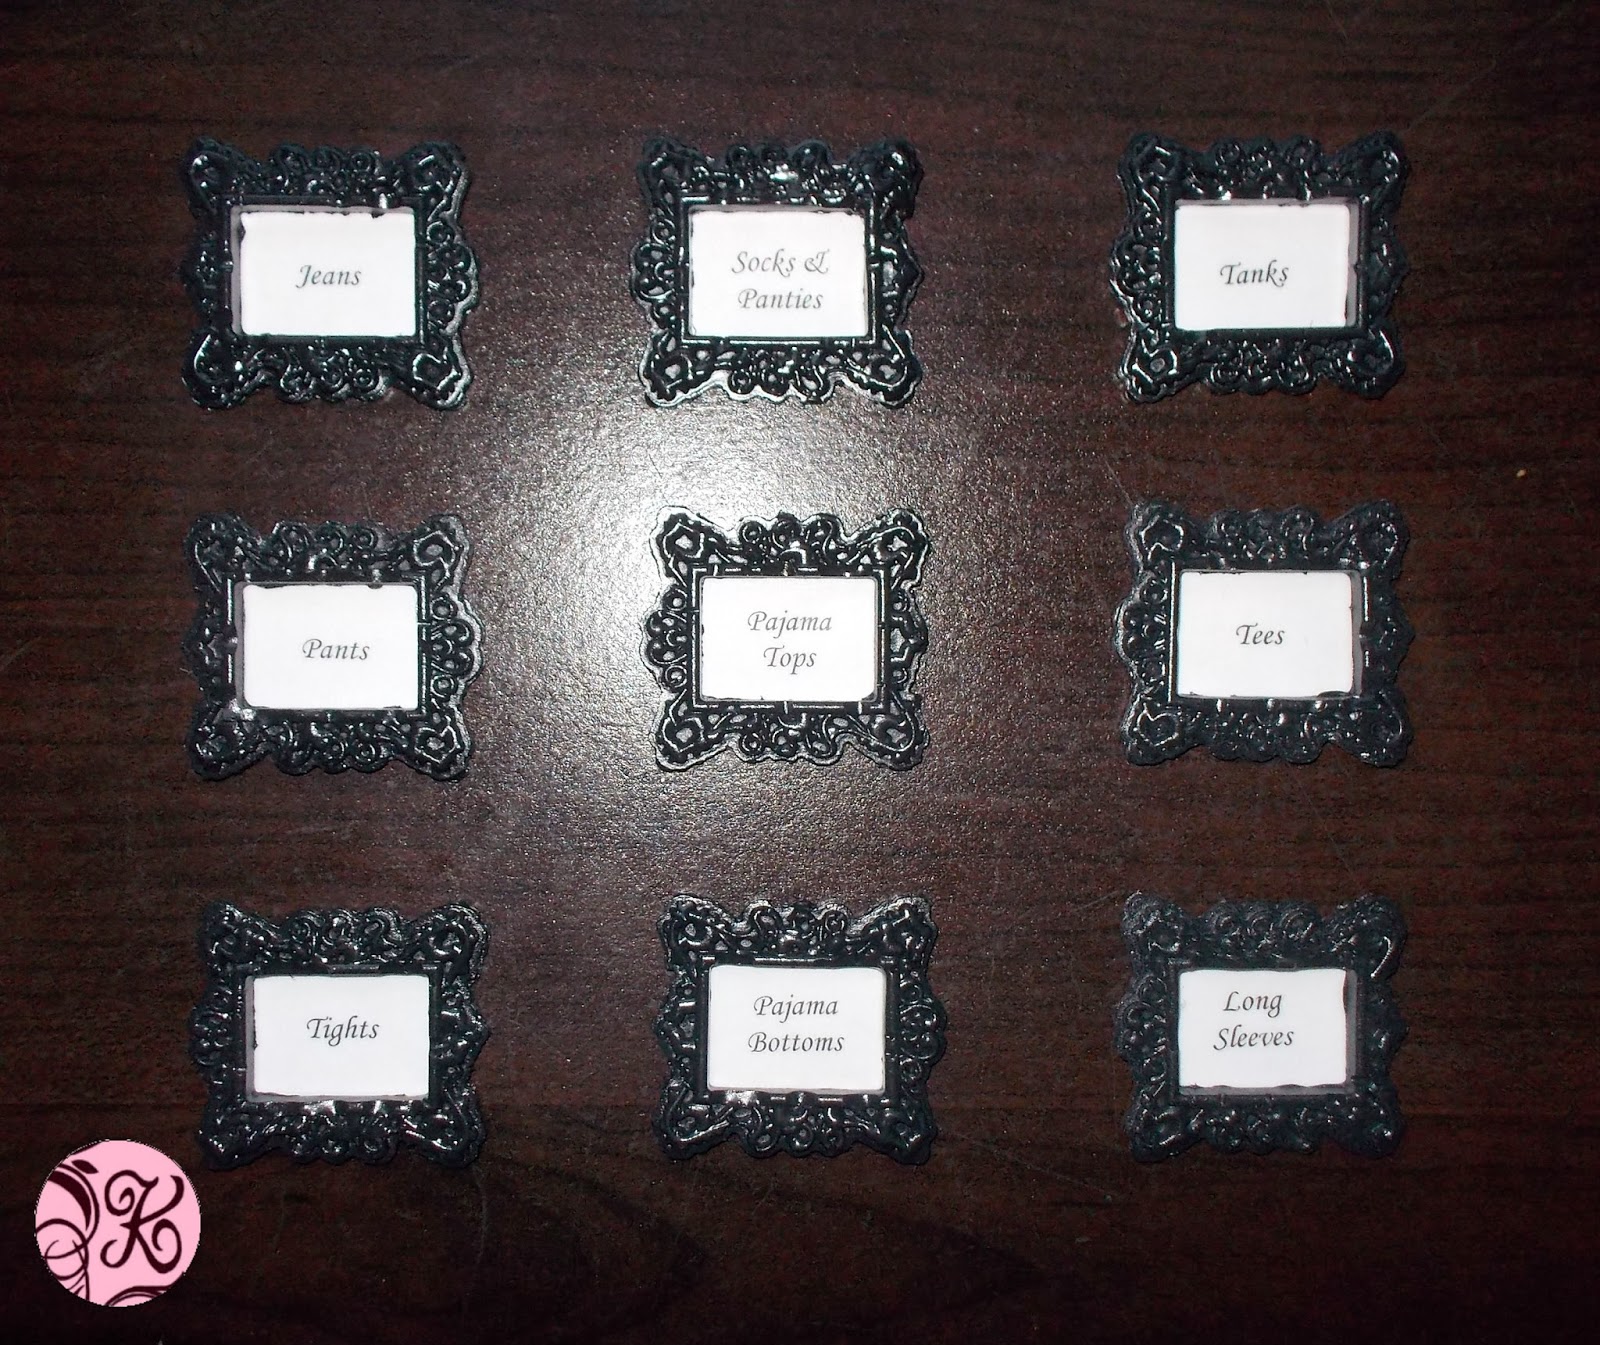
They are only about an inch big, but I think they’re going
to make a huge impact on my dresser revamp. I made them with Mod Molds, a
product by Mod Podge that you use with a high-temp mini glue gun.

This mini project to make mini frames for mini labels was
hugely easy. Simply put a Mod stick in a glue gun, and fill up the silicone
mould. I bought a new glue gun just for this project, in order to avoid some
sort of Mod/glue stick battle, but I don’t know if that was necessary. I don’t
know, maybe you can use regular hot glue rather than spending money on these
Mod sticks, but I didn’t want to chance wrecking the silicone mould. So here we
are:

Once the moulding cools, pop it out of the mould and start
again. And again, and again, and again…

You’ll notice that the frames are a little rough in their
current state:

I used a regular exacto-knife and a steady hand to shave off
the extra bits of mouling I didn’t want. Oh, and I threw out the first one I
made because it wasn’t as good as the others. *Learning curve*

Then I painted each one with black acrylic paint.

Which turned out to be mat, because acrylic paint is not
shiny all by itself.

So I sprayed them all with my high-gloss, clear, acrylic,
top-coat spray paint.
To add the labels, I printed out tiny words in a pretty
font, cut them to size, and used scotch tape to tape them to the backs of the
frames. No frills there.

Check them out!
I plan on using E6000 when the time comes to attach these
labels to my dresser. Just a tiny dab in each corner should *hopefully* do the
trick. Stay tuned!
Nice to read your article! I am looking forward to sharing your adventures and experiences.
ReplyDeleteΘωρακισμένες πόρτες